
|Home| |Contact Me| |Quiz| |Questions and Answers| |Background Tutorial| |Siggy Tag Tutorial| |Letter Creator Tutorial|

This is what we are going to create and then take into Letter Creator to be used in IncrediMail
Copyright information: The tube used in this tutorial was received in a group setting as a share, I do not claim any rights to it, just in the use of the creation of this tutorial. I am not aware of who the artist is or who tubed it the title name is j071010.
01. Select a tube (a tube is an image saved as a .png, .tub, or .pspimage. There are others but these are the most common)
02. Shift D (duplicates tube) the tube and minimize the original (for later use of the tube information)
03. Shift S (which changes the size the tube) change the height to 400 and the width will self adjust as you will notice in the image below. *Note* A tube that is taller works best.
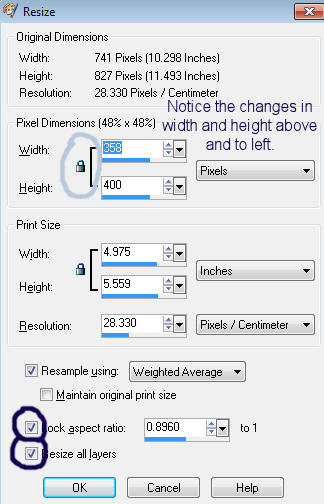
04. Ctrl C (Copies the tube) and minimize (for later use)
05. Select the dropper (Ctrl E) and select a light color for foreground (left click) and a dark color for background (right click)
5a. *Optional* Open new image. File>New or Ctrl N, 50 width and 50 height, shift D to duplicate, left click in one to create a foreground color box and right click in the other one to create a background color box (I use these so I always have the colors to use when creating siggy tags) Save as a JPEG Optimize File>Export>JPEG Optimizer>
06. Open another new image. File>New or Ctrl N, 2000 width (or preference) and 410 height
07. Select All (Ctrl A), Edit>Paste>Paste into selection (Ctrl, Shift, L) Save Ctrl S
08. Effects>Distortion Effects>Twirl use settings below.

09. Repeat twirl Edit>Repeat Twirl or (Ctrl Y) and deselect Ctrl D.
10. Effect>Image Effects>Seamless Tile with settings below.
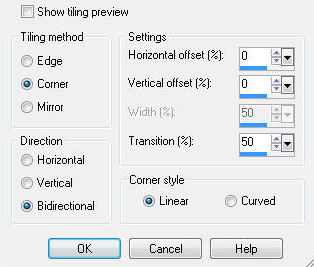
11. Click Raster 1 in layers palet and flood fill Ctrl F with Foreground color by left clicking
12. Layers>Merge>Merge Visible Save Ctrl S.
13. Repeat Twirl with the same settings Effect>Distortion Effects>Twirl (The settings should be the same from step 8)
14. Effects>Distortion Effects>Warp with settings below
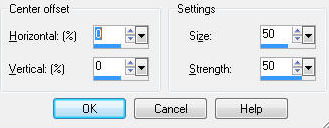
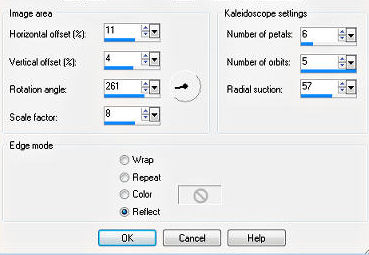
15. Effects>Reflection Effects>Kaleidoscope with the settings below. Save Ctrl S.
16. Effects>Image Effects>Seamless Tile with default settings-These should be the same as step 10.
17. Effects>Texture Effects>Blinds with settings below.
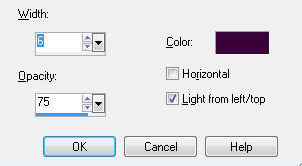
This is what I have so far, resized 50%

18. Layers>Merge>Merge Visible
19. Effects>Image Effects>Seamless Tile with settings below.
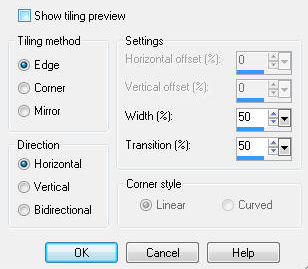
20. Layers>New raster layer, flood fill Keyboard shortcut F with your light color and lower opacity to text friendly. I used 70%. Merge down Layers>Merge>Merge down.
22. File>Paste or Ctrl V the tube and move to the far left, leaving space between left, top and bottom edges. Save Ctrl S.
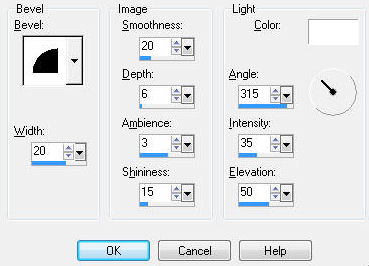
23. Effects>3D Effects>Innerbevel with settings below.
24. Effects>3D Effects>Drop Shadow with settings below.
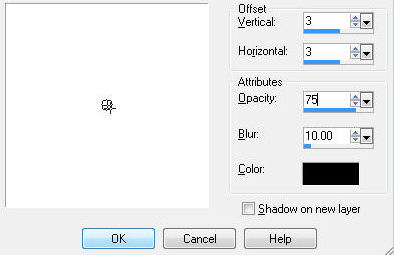
25. You can add any accents, text and any artist/credit information.
26. Add new layer Layers>New Raster Layer.
27. Add watermark.
28. Save Ctrl S.
That is it, you are done with this part, move on to the 2nd part by clicking on Siggy Tag Tutorial at the top or bottom of page.
Please link your results to my email lisaschweitzer316@gmail.com|Home| |Contact Me| |Quiz| |Questions and Answers| |Background Tutorial| |Siggy Tag Tutorial| |Letter Creator Tutorial|